Showing posts with label FOOD. Show all posts

PLANNING AHEAD... FROZEN BREAKFAST BURRITOS

Monday, January 21, 2013

We've started cutting our trips to Wal-Mart waaaay back, because if your like me it's easy to spend a $100 every.single.time you go in that place!    So in order to do that we've really gotten serious about organizing the pantry, meal planning several weeks at a time & freezing food.

We are always in a rush in the mornings and we used to stop in at Sonic on the way to school for a quickie breakfast burrito.  Several times a week times three kids will add up over a month long period. So, we decided to make our own and freeze them.  These are easy to assemble, you can make ALOT in short period of time, they freeze well and after a quick minute in the microwave they taste great!  


Here's what you'll need:

  • eggs
  • half and half
  • potato
  • sausage
  • flour tortillas
  • cheese
  • salt/pepper
*The recipe shared below makes 9 generously filled burritos.*

First, crack your eggs in a microwave safe dish.  Add a splash (1/3 cup or so) of half and half, a dash of salt/pepper plus I like to add about a tsp. of water.  Scramble up your eggs and mix everything together with a fork.  Place in the microwave for about 3 minutes or until your eggs are completely scrambled.

While the eggs are cooking, fry up your sausage.  I used one package of blue and gold.  Once your sausage is done, set aside to let it drain.

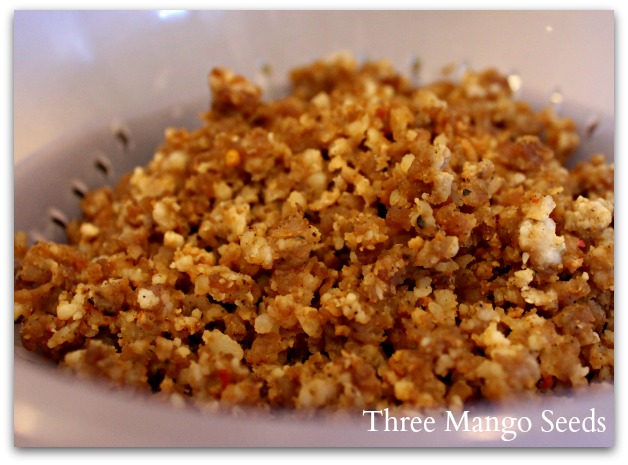
Now, peel and dice up your potato, then fry it up in your left over sausage grease!

Once everything is finished cooking, throw it all together in a large bowl and mix.
Heat up your tortillas until they are warm, start filling and placing half a slice of cheese on top and wrap them up.  I fit three rolled burritos to a freezer bag since I normally warm up three each morning.  

That's it! Plus, I still have cooked sausage left over to freeze for another meal.  I've mentioned "fry" and "grease" here but seriously these still have to be more nutritional than SONIC!
The kids eat these with hot sauce but they would also be great with jalapeno's or just about anything else that makes your mouth water!  This only takes about 30 minutes to do and is so worth it.  I wish I would've started looking at ways to simplify our mornings sooner!

Do you meal plan?  Do you freeze meals?  I'd love to know - I've been a pinning maniac the last few days.  My RECIPES TO TRY board is gonna be blowing up!

Enter your email
to have THREE MANGO SEEDS posts sent to your inbox.

Enter your email address:

Delivered by FeedBurner

THANKSGIVING TRADITIONS & AUNT TUFFIE'S PUMPKIN PIE RECIPE

Thursday, November 15, 2012

Thanks for stopping back by today to grab my grandma's pumpkin pie recipe.  Through the years my grandma had saved all of her recipe's that had been passed on to her in little metal tins.  When grandma passed away, the tins went to my mom and little by little she is passing them on to me.

I wish grandma could see that all of her hard work in trying to teach me to cook so my husband wouldn't starve has paid off.  

Anyway, I decided to share this recipe because the kids love pumpkin pie.  Seriously, this time of year I bet I make 20+ pumpkin pies!  Here's the recipe, it's delicious!


I'm pretty sure grandma made her own pie crusts, but I opt for the easy & fast way.  Store bought Pillsbury crusts and I go way back. LOL

Here's my pie in all of it's glory. 

The silverware is actually a boxed set that was also from my grandparents.  And the plates, well I found them at a vintage store that are stamped 14K Gold with a royal seal on back.  Wonder if they're worth some money? LOL


Hope you enjoy this recipe as much as we do!  Happy Early Thanksgiving y'all.  Thank you so much for partying with us...

The link party is still going strong, so if you'd like to link up you can do that here.

Also, don’t miss a single post – it’s easy to stay in touch!


RECIPE & 2 PARTIES!

Wednesday, October 3, 2012

Happy HUMP-day you guys!  I want to start this post off by saying that I have met so many new blog friends over this past week since all I've been doing is lying around playing on my android while my back heals!  The doctor said it would get worse before it got better and she wasn't kidding!  I'm so ready to be "back to normal" but my kids say I was never really "normal" to begin with! LOL

Anywho, one of the gals I've met is Cheri over at, It's so Very Cheri.

And Cheri invited me to a group where I'm getting to know a ton more gals who have way more knowledge about this whole bloggy world so hopefully they don't realize it and kick me out!  Kidding!  They really are a bunch of nice women who are also very helpful so I'm learning lots too. THANKS Cheri and the other girls who have made me feel so welcome.

Cheri is also taking the next 31 days to write about...


Lord knows I need to follow along all 31 days.  After reading her post I decided I really needed to start eating healthy.  But you know when you want to eat healthy, but nothing sounds good and you just want to give up, go grab take-out & promise to start tomorrow?  Well I almost did that...instead I decided to start eating more veggies.

My grandma made the best squash and I haven't had anything like she used to make until today.  It was sooooo simple, sometimes I think we make things more complicated by adding more but in this case less was the answer.

I used..
1/2 white onion
3 small squash
2 pats butter
salt & pepper
cast iron skillet

I let it simmer in the pan until some of the edges were turning crispy, and it still had somewhat of a crunch to it.  Guess what?  My squash turned out P.E.R.F.E.C.T!  Why have I tried cooking squash a bazillion times before...breading it, frying it and never liking it.  I hardly did anything this time and the flavor was YUM!


For those of you who already make perfect squash please disregard this post, but I know that there are some of you who will be happy to know just how S.I.M.P.L.E it is to whip up yummy veggies.

Oh yeah, & in case you plan to follow along with Cheri on her 31 days to a thinner you & me....I drank my water today too! :)

Now, right quick before I go I wanted to share with you all another FALL PARTY that you simply cannot miss...


It starts TODAY!  Click here to go check it out!


Better Homes & Gardens VANILLA FRENCH TOAST

Sunday, October 23, 2011


I'm so excited to be guest posting over here at Restoration Redoux! Thank you Shanna for having me.  I wanted to share one of my all time favorite breakfast recipes with you all.  Hope you ♥ it!

This is a quick & easy breakfast that is Dee-lish!  Breakfast is a big deal around our house so I'm always on the lookout for great morning recipes and this one is so dang good that I had to share it with y'all!

I like to cook ours on an griddle because you can cook so many pieces at once so I begin by melting several pats of butter on my griddle so its all kinds of buttery goodness.  I try and keep my heat around 275° so the outside doesn't get too brown before the inside cooks.

Here's the easy 1 - 2 - 3:

ingredients
  • 4 eggs, lightly beaten
  • 1 cup  half-and-half or light cream
  • 2 tablespoons  sugar
  • 2 teaspoons  vanilla
  • 1 teaspoon  ground cinnamon
  • 1/4 teaspoon  ground nutmeg
  • 8 slices  dry white or whole wheat bread
  • 2 tablespoons  butter or vegetable oil
  •  Maple-flavored syrup
  •  Sliced bananas (optional)
  • VIA BHG


1.  In a bowl, beat eggs, half & half, sugar, vanilla, cinnamon and nutmeg.  Dip bread into your mixture, making sure to coat both sides.

2.  Cook your break until golden brown, turning them once.  Serve with real maple syrup and you'll be in heaven!


And if it's a cold morning like it is here...then load up the fire place while your toast is cooking.  I even had enough time to sweep off the back porch while my toast was finishing up on the griddle.


By this time, the aroma of the vanilla french toast & bacon fills the air and helps to draw all those kiddo's down for breakfast.  A warm fire doesn't hurt either!  


xoxo, Clydia @ Three Mango Seeds


Enter your email
to have THREE MANGO SEEDS posts sent to your inbox.

Enter your email address:

Delivered by FeedBurner


Front porch fluffing & jalapeno chicken

Tuesday, September 27, 2011


It had been so HOT lately that I had really begun to neglect our front porch.  Sorry for being a bad blogger and not taking a before picture.  Let me just say...it was not inviting.

I planted some mums, trimmed back the overgrown sweet potato vines and gave the porch a good rinse.


 I still need to replace the flag holder {5th time, no joke, crazy Oklahoma winds} and make a new fall wreath for the front door.  But all that will have to wait for another day.  I've got some hungry kids and they are wanting Jalapeno Chicken.
This was a fire station recipe but its so darn good that I wanted to share it with ya'll.


Jalapeno Chicken

6 to 8 large chicken breasts {cut into small bite size pieces}
Buttermilk {1/2 a pint}
Small jar of jalapeno slices w/the juice
Flour
Panko bread crumbs

The night before:  Marinate your bite size chicken chunks in enough buttermilk so that all the pieces are almost covered and then dump in the entire jar of jalapeno slices and juice.  Cover and let sit in the frig overnight.


The next day, scoop the chicken out with a slotted spoon and dump in a bowl of flour.  Shake to coat them well {just a few at a time} and fry them.  I like to use a cast iron skillet but anything will do.  Just make sure your oil is really hot before you put the chicken in.  Last, I will bread all the jalapeno slices in flour and fry them up too!  YUM!  so good!

 
I literally have to run my kids outta the kitchen when I cook these, because they eat them off the plate as fast as I can cook them.  Try these...you'll love 'em!


Trying a new recipe...Cake Batter Cookies!

Monday, March 14, 2011

I know you've all heard of the Pioneer Woman Cooks or the Tasty Kitchen food blog.  Well I was introduced to these "cooking blogs" in early 2010.  I know ~ I'm always late to the party.  Anyway, I {like many of you} fell in love instantly and thought to myself I can do these step by step recipes.  Thus began my love for trying to cook and seeking out great food blogs.

I've never been a great cook.  Well let me clarify, I'm not really great with dinners but I can bake!  Either I get really lucky when I try new dessert recipes or its a sad twist of fate that all the bad for your hips recipes turn out great when I attempt them.

I found another great food blog with lots of good recipes at Mommy Hates Cooking.  I saw a recipe for cake batter cookies and knew right away I needed to try these out.


Here are the ingredients...


  1. Yellow cake mix
  2. Half of a cup of cooking oil
  3. Half of a cup of applesauce
  4. Two large eggs
  5. One cup of chocolate chips {I think I may have used way more than that!}
 So easy, tossed all the ingredients into a large bowl and mixed it all up.
Once its all mixed up she recommends letting it chill in the frig for a couple of hours.  I couldn't wait!  I let it chill about 10 minutes. Ha!  Baked them in a 350 degree oven for about 10 minutes.
The recipe made a little more than 3 dozen for me.  Our kids went crazy over them and they are so easy! 

However, if you head on over to http://www.mommyhatescooking.com/2011/01/cake-batter-chocolate-chip-cookies.html you can see hers for yourself!  Hers look perfect!  While your there check out her entire site, you won't be sorry!  She Rocks!

If you have any cookie recipes that you would like to share I would love to see them!  XOXO 
 

Easy Peasy Chicken Sandwich

Sunday, March 6, 2011

I thought I'd share this recipe with you.  It's two ingredients so can you really call it a recipe?  Hmmm who knows but it was good, quick and all three kiddos ate it so it is a success in my book.  Ha!  When Eddie is at the fire station I know I still need to cook a good meal for the kids, but I really don't want to.  Is that wrong?  Nah.

Anyway, all this takes is about a cup and a half of Head Country BBQ sauce and shredded chicken.  Did ya know that you can buy pre-cooked chicken in a can?  Well ya can and I dare say it is pretty good & FAST, which is important when you have no desire to be in the kitchen in the first place!  I simmered these two together on low in the crock pot then toasted the buns (which I toasted a little too long as you can see) and served with some Lay's chips.  Wha-la!  Dinner is served and now I can go slip into my comfy pj's, grab a good book and relax by the fire.

XOXO

Craving CHOCOLATE...here's an easy recipe.

Wednesday, December 8, 2010

Last Sunday afternoon was a lazy day.  Hubby was gone for 24hrs at the fire station.  The kids and I did absolutely nada except watch movies all day long by the fire.  It was wonderful.  However, you can't watch movies without good snacks and we were craving chocolate.

Running to the store was totally out of the question since I never changed out of my pj's or ran a brush through my hair all day.  I told you we were lazy!

Here's what we made...


 YUM!
1 roll of pillsbury crust
roll out the crust & smear some butter on it
sprinkle crust with sugar & cinammon
drop a few milk chocolate chips & marshmallows down the center
gently pull the sides up & overlap them just a little to seal
brush crust with  whisked egg (1) & a little melted butter
sprinkle with cooking sugar (bigger granules than reg sugar)
then just a tad more cinammon
bake at 350 degrees till the crust is golden, slice & enjoy!
Hope your family likes it as much as my kiddos did!
 
site design by designer blogs