Stripping & Refinishing

Monday, April 25, 2011


I didn't get a great "before" shot of this furniture that was given to me.  Can you believe it was FREE?! A friend from church brought it to me!

 This was my first refinishing project and I learned that you shouldn't let the citristrip dry on your piece!  However, I also learned that if you do, all you need to do is smear some more on it, wait a few minutes and start scraping it off.  After that it really did come off pretty easily.


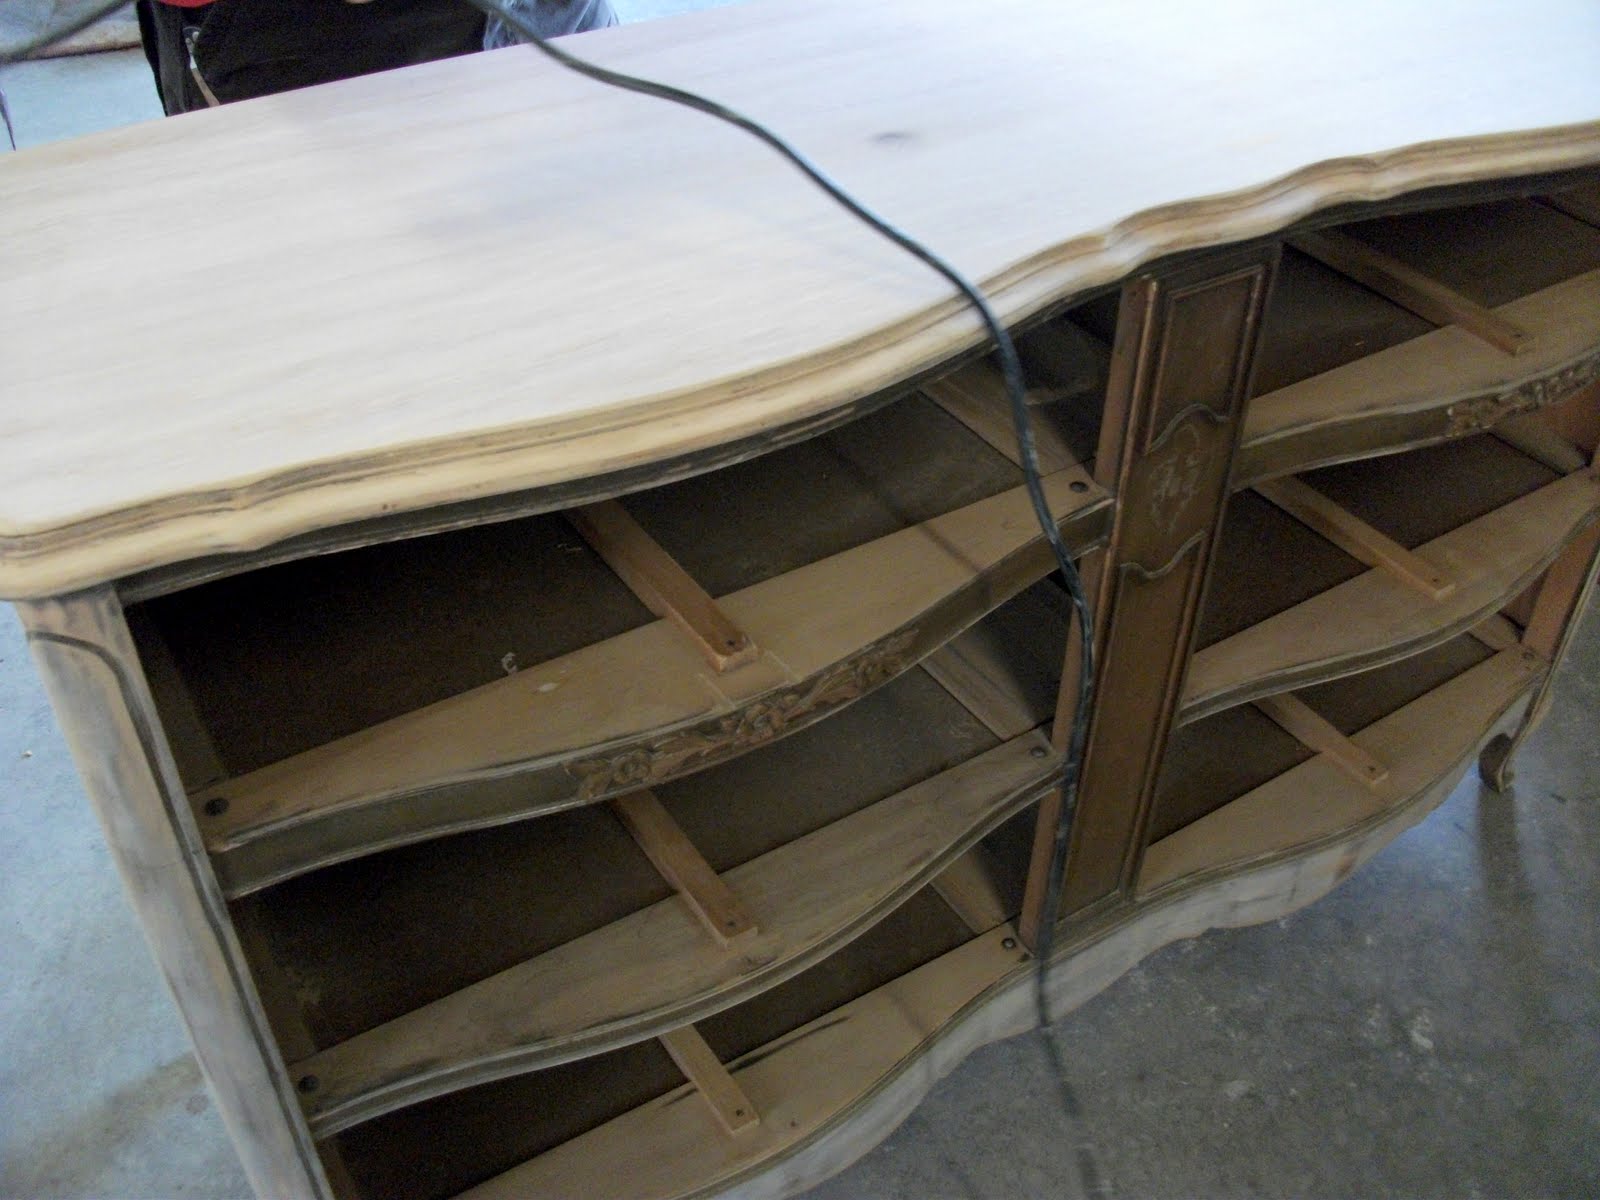
After stripping, I used a hand sander to go over the entire piece before I primed it.  My plan was to completely strip the top so I could re-stain it and paint/distress the bottom.  Once I finished sanding I cleaned it off completely with a damp rag and let it dry.  Here they are ready for primer...

And here they are ready for the first coat of paint...


Finally, this is with the first coat of ivory paint...


I thought the tops looked great even without the new stain after the way they had looked when I got them. I'd even started a little distressing at this point.

Here is the side table with the final coat of dark walnut stain and wipe on poly.  I also used some of the stain to rub on the bottom half.


I'm not quite finished with the dresser yet, but this is what she looks like at this stage.  
I haven't decided if I like the handles black or if I want to paint them ivory and distress them.  But overall I am so excited that I tackled this project.  I thought it would be overwhelming but I was really surprised at how much I enjoyed the process of turning something "ugly" into this!

Now, I'm thinking I want to turn that headboard into something wonderful for my youngest daughters room...adding that to the "project" list!

I'm linking up to...


Domestically Speaking


My Uncommon Slice of Suburbia

Finally -- Garden Pics

Tuesday, April 19, 2011

A while back I told you all that we were working on putting in a garden.  Well after working like animals the last few weekends, we are finally beginning to see the fruits of our labor!
Here are some shots of what we've done!  First of all, we put in a small picket fence {tutorial to follow} to keep out this little guy.

 
 Took us a Saturday/Sunday afternoon, but it wasn't too bad.  We also did it on the cheap by using $1 pickets from Home Depot, cutting them down to size and dog earring them ourselves.  The gate hardware was only $15 and a cinch to install.  
 We even created a little sitting area "on the garden side" so we can hopefully watch our garden grow!  I painted an old terra cotta pot red and filled it with good soil and herb seeds.  Hopefully soon I'll have fresh basil, cilantro & oregano.

We created three long beds for watermelon, cantaloupe, pumpkins, okra, summer squash, red & green grapes, romaine & iceberg lettuce and green onions.
Another long, skinny bed for Photina's, weeping willows, creeping phlox, strawberries and jalepenos.

And one last BIG, deep bed for corn, green beans, carrots, blueberries and lots of tomatoes.
All in all it was a TON O work, but we are so happy that we did it.  Every morning we go out to water and cannot contain our excitement over the new little green buds sprouting!  I'm sure we'll learn ALOT as we go and will probably see things we should have done differently, but for now we are totally proud of what we have accomplished!

I've linked up to...

Wanna earn FREE stuff?

Monday, April 11, 2011

You can!  It's so easy to earn all kinds of stuff, but I stick to the magazine subscriptions!   


A few weeks ago I found out about my coke rewards program started plugging in those codes here and there and already have one free subscription for a year for all because of this little sweet thing...


Here's how you can do it too...

For all the "jacked up on sugary" details head on over to my COKE rewards.   Once there, you can sign up for a free account, get all the information on what products can earn you points and where to find the points on the product, plus you can browse through a reward catalog.

Oh yeah, I almost forgot!  For those of you who have beat your sugar addiction, DASANI water is also a COKE product and you get 20 points for a 24 pack!  WOOHOO!

I just earned a FREE subscription to ...
So, if your so inclined head on over and start earning...
XOXO


The Handpainted Sign...Part Deuce!

Monday, April 4, 2011

Well here it is....Finished!
Initially we had secured the boards with two thin boards purchased at Lowes and used screws to attach all the boards together.  After really thinking about how it would hang {since it is really heavy} we decided that wasn't such a great idea.

My Mr. took all the screws out & started over...ugh.  Learn from our mistakes people! LOL  We purchased a thin sheet of precut wood at Home Depot {amazingly there was one very close to the size of this sign} all I had to do was rip it down just a tad on the table saw.


Used liquid nails to attach each board to the precut wood after centering my sign on it.  After all the boards were glued on and then framed.
{UPDATE:  Now we use liquid nails as well as small screws to hold the wood onto the back board.}
Once he had made the mitre cuts and made sure that all the angles looked good he attached the framing from the backside of the sign.
{UPDATE:  Now we do not trim any of the board down.  We make our entire sign, frame and all fit onto the thin board.  Learn as you go right?!}


We found these metal brackets and used these to "pull" the edges together so that the front side of the sign looked flush.  Please forgive my terminology here I know its not builder/sign-maker talk but I understand myself so hopefully you'll get the idea of what I mean. hehe  

We used these to attach to the back and will string wire in between to hang the sign with.
And here it is all done.  I haven't hung this yet, but I will this weekend.  What do you think?  I really love the the way it turned out.


PS~I made that "M" pillow too!  I just love all the inspiration that floats around blogland! 

XOXO
 
site design by designer blogs